
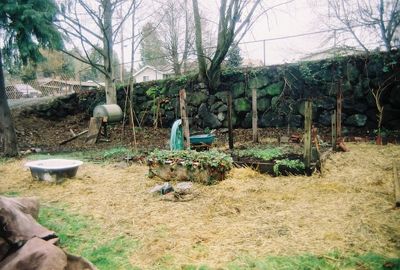
Gardening 101: Start now, so you’ll have a new planting area in spring
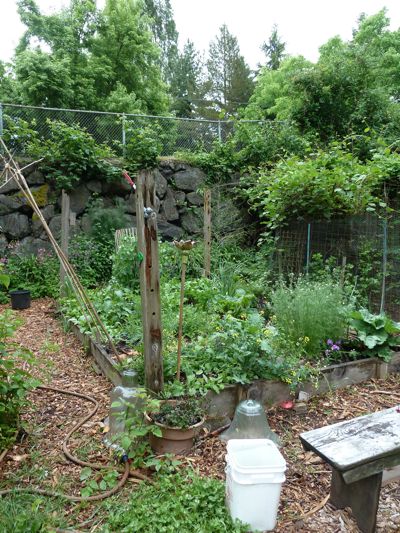
(After and before!)
By Vera Johnson of Village Green Perennial Nursery
Special to White Center Now
New garden beds over existing lawn: Skill level…Easy.
Have you been wanting to start a garden in an area of your yard, but it feels too overwhelming and you have no idea where to begin?
Do you have too much lawn to mow? Want to get rid of some of it?
Want to grow food and flowers? Growing perennial flowers is essential to healthy vegetable gardening, as the bees rely on the food source and the wasps that are attrracted to the plants are a predator to many of the bugs that attack vegetable starts … more on that later!
It’s really quite easy, but it does take some effort. Are you in? Willing? Then let’s go!!
Gather materials…this can take time, and that’s ok.
* Look around and see what you have to work with…rocks, concrete chunks from an old sidewalk or patio, wood rounds (preferably small diameter)
*Cardboard with tape and staples removed
*Newspaper…no shiny pages; the chemicals in the inks are not what we want for the gardens.
*Fallen leaves – there should be plenty in the neighborhood; ask your neighbors. Leaves (not all leaves are equal – see below) are a treasure trove of nutrients. You can also get free wood chips from a tree service; call ahead and have a place ready where they can dump, and you will get all the free mulch you can handle.
*Fertilizers (organic) with high nitrogen. Blood meal is great; bat guano; or fresh chicken manure if you have chickens – we’re not planting right away, so there’s no risk of burning the plants’ roots. I also LOVE to use KELP in this procedure, the soil benefits are spectacular.
1. Choose your location (think big, don’t limit yourself!) I like to use a garden hose to determine the border and have a visual aid for what the garden will look like.
2. Mow or weedwhack the area you’ve chosen (very, very short…leave the clippings for extra nitrogen)
3. Lay a heavy dose of nitrogen (fertilizer and/or manures) over the entire area you are planning to use as a garden; this will heat up under the layers we are about to put on the new garden and be ready in spring … patience.
4. On the chosen area for the new gardens, lay out cardboard so that it overlaps – or newspaper in thick layers, also overlapping – to prevent weeds from pushing up through. You are laying the paper or cardboard over the existing mowed lawn, and over the fertilizers.
5. Water the paper or cardboard to keep it from flying away. This is the stage where you can start heaping on the raked leaves. Birch, maple, oak, alder are the best leaves for this project.
You can also pile on any small branches and wood chips (not bark mulch, which is not a useful garden product, as it repels water – don’t get me started). You want the top layer to be at least 6 inches deep, more if possible. This will get the underground soil food web something to work on over the winter.
Come spring, you will be amazed at how loose and workable the ground is. You can expect to be able to stick the shovel in, right into the paper/cardboard; dig a hole, add fertilizer, soil amendment, and plant whatever you were planning to put in the garden.
Vera Johnson is proprietor of Village Green Perennial Nursery, and plans to share some gardening advice/secrets/info here from time to time. She writes about a variety of subjects at her own website – check it out here.
You can follow any responses to this entry through the RSS 2.0 feed. Both comments and pings are currently closed.